
Finishing a basement is one of the best ways to add usable living space and increase your home’s value without the hefty price tag of an addition. Whether you want a cozy family room, a home office, a workout space, or a guest bedroom, a well-finished basement can transform your home.
If you’re wondering how to finish a basement, this step-by-step guide will walk you through the essential remodeling tips to maximize your space efficiently and beautifully. Let’s dive into the process — no construction experience needed!
Why Finish Your Basement? What Are the Benefits?

Before jumping into the how-to, let’s quickly cover why finishing your basement is a smart move:
- Extra living space: Adds valuable square footage without moving or building.
- Increased home value: Finished basements can boost resale price and attract buyers.
- Versatility: Customize for whatever your family needs — playroom, office, gym, or rental suite.
- Energy efficiency: Proper insulation and finishing can reduce heating/cooling costs.
- Improved comfort: No more cold, damp basement; enjoy a cozy, dry space.
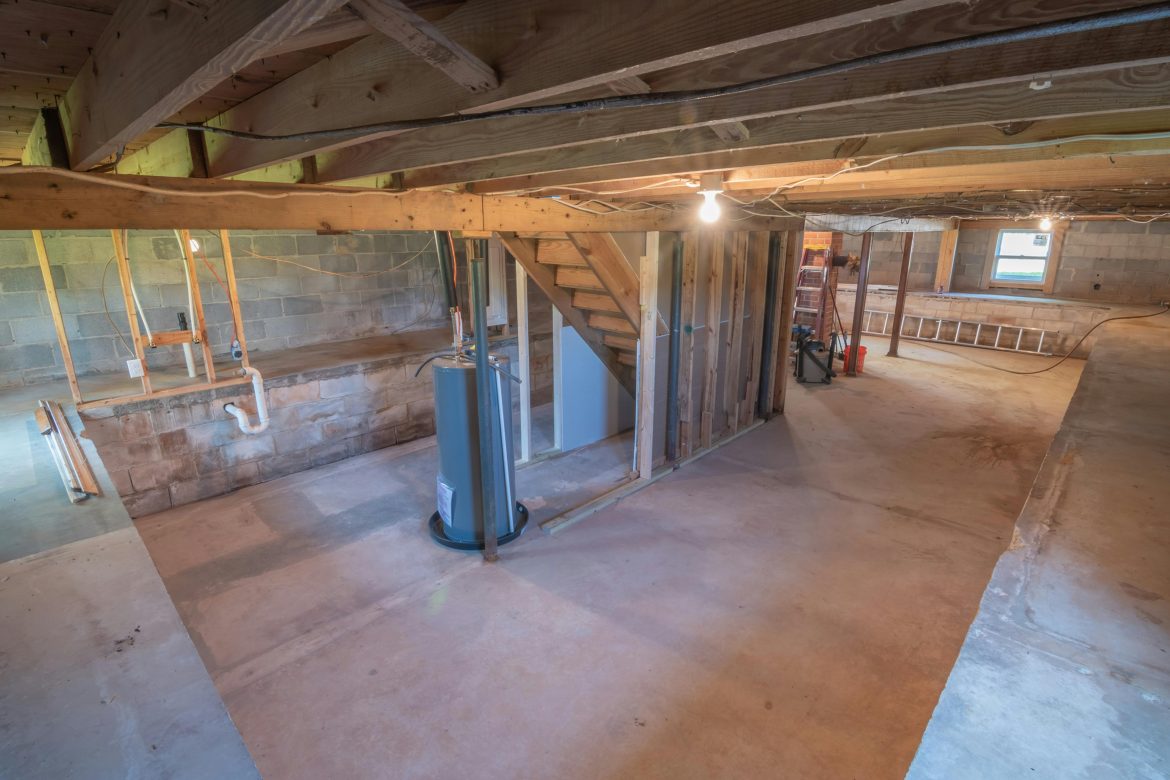
Step 1: Assess Your Basement’s Condition and Layout
Before you start swinging a hammer or buying materials, the very first step is to understand what you’re working with. A detailed assessment of your basement’s current condition will save you headaches later and help you plan a safe, effective remodel.
Check for Moisture Issues
Basements are notorious for moisture problems, and ignoring these can lead to mold, structural damage, and an unhealthy environment.
- Look for signs of water intrusion: Check walls and floors for discoloration, peeling paint, efflorescence (white powdery deposits), or damp spots. Smell the air for mustiness, which indicates mold or mildew.
- Use a moisture meter: This handy tool measures the moisture content in concrete, wood, and drywall. You can rent or buy one cheaply. Spot-check all areas, especially corners and near foundation walls.
- Inspect sump pump and drainage: If you have a sump pump, ensure it’s operational. Check if gutters and downspouts direct water away from your foundation.
- Address water problems before remodeling:
- Repair foundation cracks with hydraulic cement or epoxy injections.
- Install or upgrade drainage systems like French drains around the foundation if necessary.
- Consider adding a vapor barrier on walls and floors after waterproofing.
- If water issues are severe, consulting a basement waterproofing specialist is worthwhile.
Measure the Space
Accurate measurements are essential for framing, flooring, and furniture planning.
- Measure the length, width, and ceiling height of the entire basement.
- Identify any obstructions such as support beams, columns, ductwork, pipes, and electrical conduits.
- Note the location of windows, doors, stairs, and any changes in floor level.
- Map out utility placements — furnace, water heater, electrical panels, laundry hookups — since these impact room layout and access.
Plan Your Layout
Deciding what you want your finished basement to do will guide the entire process.
- Ask yourself:
- Will this be a living area, guest bedroom, or rental unit?
- Do you need a bathroom or kitchenette?
- How much storage or laundry space do you want to preserve?
- Popular basement uses include:
- Family or media rooms for movies and games
- Guest bedrooms or in-law suites with private bathrooms
- Home gym or exercise space
- Quiet home office or study
- Playrooms for kids
- Dedicated laundry and storage zones
- Create a rough floor plan sketch showing zones, doorways, and natural light sources. Free software or graph paper can help with scaling.
Step 2: Know the Building Codes and Permits
Permits and building codes aren’t just bureaucratic hurdles — they’re designed to keep your project safe and legal.
- Check with your local building department early in the process. Permit requirements vary widely by location and scope of work.
- Typical projects needing permits include:
- Electrical system upgrades or new outlets
- Plumbing additions like bathrooms or wet bars
- Structural changes such as framing walls or adding egress windows
- Installation of HVAC systems or modifications
- Permits often require inspections at key points:
- Electrical rough-in before drywall
- Plumbing tests before finishing walls
- Final inspection after work completion
- Getting permits ensures:
- Your basement meets fire safety, ventilation, and egress requirements (especially important for bedrooms).
- Compliance can affect home insurance and resale value.
- If in doubt, consult a licensed contractor who can guide you through permit applications.
Step 3: Prepare the Space for Remodeling
Once you understand your basement’s condition and have the proper permits, preparation is the next vital step.
Clear Out and Clean
- Remove everything — furniture, boxes, debris, old carpeting, or paneling.
- Sweep and vacuum thoroughly.
- Wash walls and floors with a mild detergent to remove dirt, dust, and mold spores.
- Allow the space to dry completely before moving on.
Address Moisture and Insulate
- Seal cracks and joints in the concrete foundation with waterproof sealants or epoxy.
- Install a vapor barrier: This is a plastic sheet or membrane on walls and floors to block moisture from entering the living space.
- Choose insulation:
- Rigid foam insulation boards are great for basements because they don’t absorb water.
- Fiberglass batts can be used if combined with a vapor barrier but may be susceptible to moisture.
- Proper insulation reduces heat loss and improves comfort, especially in cold climates.
Step 4: Frame the Walls and Ceilings
Video Source
Framing is the skeleton of your finished basement, supporting drywall, insulation, and all the systems.
What Materials Do You Need?
- Pressure-treated lumber for the bottom plate: Because it sits on concrete floors and resists moisture damage.
- Standard 2×4 lumber for studs: Positioned 16 or 24 inches apart.
- Metal framing options: Especially in humid basements, steel studs can resist warping and mold better.
Framing Tips
- Use a level and plumb line to ensure straight walls.
- Leave space for:
- Electrical wiring and plumbing pipes.
- HVAC ducts.
- Plumbing clean-outs and access panels.
- Frame doorways and window openings carefully, adding headers for support.
- Consider soundproofing with insulated studs or soundproof drywall if noise is a concern.
Ceiling Options
- Traditional drywall ceilings: Offer a clean, finished look but can make future access to pipes difficult.
- Drop ceiling tiles: Easier access to plumbing and wiring, can incorporate recessed lighting, but have a less polished look.
- Use moisture-resistant materials for framing and ceiling wherever possible.
Step 5: Run Electrical and Plumbing Systems
This phase is critical for functionality and must be done right.
Electrical Work
- Plan your lighting zones carefully:
- Overhead ambient lighting (recessed or flush mounts).
- Task lighting for work areas like desks or gym corners.
- Accent lighting for shelves or artwork.
- Code usually requires outlets every 6 to 12 feet along walls.
- Install GFCI outlets in any wet or damp areas — laundry rooms, bathrooms, or wet bars.
- If you’re not confident, hire a licensed electrician to:
- Pull permits.
- Ensure wiring meets local codes.
- Avoid dangerous mistakes.
Plumbing Work
- Adding a bathroom, wet bar, or laundry requires:
- New water supply lines (hot and cold).
- Drain and vent pipes properly connected to the main sewer line.
- Plan for fixture locations with sufficient clearance and accessibility.
- Use materials approved for below-grade plumbing to avoid leaks.
- A professional plumber should handle this work to meet inspection requirements.
Step 6: Insulate and Install Drywall
Insulation Options
- Fiberglass batts: Budget-friendly, easy to install, but vulnerable to moisture if no vapor barrier is present.
- Rigid foam board insulation: Offers a higher R-value per inch and resists moisture penetration.
- Spray foam insulation: Expensive but seals air leaks effectively and provides excellent thermal protection.
Drywall Installation Tips
- Use moisture-resistant drywall (green board) especially in basements.
- Attach drywall sheets to studs with drywall screws, ensuring no gaps.
- Apply drywall tape over seams, then cover with joint compound (“mud”).
- Sand joints smooth after mud dries for a seamless finish.
- Consider adding a mold-resistant primer before painting.
Step 7: Flooring Choices for Basements
Choosing the right flooring is vital in a moisture-prone basement.
Recommended Basement Flooring Options
- Vinyl plank flooring: Waterproof, available in many styles including wood-look, and easy to install.
- Tile: Ceramic or porcelain tiles are very moisture-resistant but can feel cold; radiant heating can be added underneath.
- Engineered hardwood: More dimensionally stable than solid hardwood but still needs moisture barriers.
- Carpet tiles: Good for adding warmth and noise absorption; easy to replace if damaged by moisture.
- Epoxy-coated concrete: Durable, moisture-proof, and creates a modern, industrial aesthetic.
Flooring to Avoid
- Solid hardwood or laminate without a proper moisture barrier can warp or buckle.
- Wall-to-wall carpeting is risky because it traps moisture and can promote mold.
Step 8: Paint and Finish Your Basement
- Use light, neutral paint colors such as soft grays, creams, or pastels to brighten the space.
- Semi-gloss or satin finishes stand up better to moisture and are easier to clean.
- Consider an accent wall with bold color or textured wallpaper to add personality.
- Install baseboards, crown molding, and window trim to make the space feel complete and polished.
Step 9: Furnish and Decorate to Maximize Space
Your basement is finally ready to come alive with furniture and decor.
Tips for Maximizing Space
- Opt for multi-functional furniture: sofa beds, ottomans with storage, fold-away desks or Murphy beds.
- Choose low-profile furniture to keep sightlines open and avoid a cramped feel.
- Use mirrors strategically to reflect light and create a sense of openness.
- Install built-in shelving or cabinetry to keep clutter off the floor.
- Define different zones using area rugs, furniture placement, or room dividers.
- Add plenty of layered lighting — table lamps, floor lamps, and wall sconces — to make the space inviting.
Common Questions About Basement Finishing
How Long Does It Take to Finish a Basement?
The timeline varies widely depending on the scope of work, size, and whether you DIY or hire contractors. Typically, expect 2 to 8 weeks for a full remodel.
How Much Does It Cost to Finish a Basement?
On average, basement finishing costs range from $20 to $50 per square foot, depending on materials and labor. Adding bathrooms or high-end finishes will increase costs.
Can You Finish a Basement Without a Permit?
While some small cosmetic work might not require permits, most structural, electrical, and plumbing changes do. Skipping permits risks safety, resale issues, and fines.
What About Basement Egress Windows?
If you’re adding bedrooms, building codes often require egress windows for emergency exits. These windows also add natural light.
How to Finish a Basement Without Committing These Mistakes
Finishing a basement is a rewarding project, but some common mistakes can derail your efforts. Avoid these pitfalls to ensure your finished basement is comfortable, durable, and problem-free.
Mistake #1: Skipping Waterproofing
Moisture is the biggest threat to any basement remodel. Ignoring waterproofing can lead to mold, damaged materials, and costly repairs. Always inspect for leaks, seal foundation cracks, install vapor barriers, and ensure proper drainage before starting.
Mistake #2: Sealing Walls Completely Tight Without Ventilation
While it’s important to keep moisture out, creating a completely sealed space without ventilation traps humidity inside. This can cause mold growth and poor air quality. Incorporate ventilation options like air exchangers or dehumidifiers to maintain healthy airflow.
Mistake #3: Underestimating the Importance of Lighting
Basements typically have limited natural light, making them feel dark and cramped. Relying on insufficient lighting will leave the space uninviting. Plan for layered lighting—overhead, task, and accent—to brighten the area and highlight key features.
Mistake #4: Poor Planning of Electrical Outlets and Switches
Not planning enough outlets or poorly placed switches leads to inconvenient setups with extension cords and limited device placement. Follow code requirements and think about your future needs for electronics, lighting, and appliances.
Mistake #5: Using Non-Moisture-Resistant Materials
Standard drywall, insulation, or flooring not designed for basement conditions can deteriorate quickly due to dampness. Opt for moisture-resistant drywall (green board), rigid foam insulation, and waterproof flooring options to avoid future problems.
Mistake #6: Failing to Double-Check Measurements Before Ordering Materials
Basements often have irregular layouts and obstacles that affect measurements. Ordering materials without precise measurements can cause delays, waste, and extra cost. Measure twice, and consider odd corners, support beams, and ceiling heights carefully.
Mistake #7: Neglecting Soundproofing in Media or Playrooms
Basements can amplify sound, causing noise issues upstairs or in adjacent rooms. Skipping soundproofing makes media rooms or play areas less enjoyable. Use sound-absorbing insulation, resilient channels, or specialty drywall to contain noise effectively.
Final Thoughts: Your Basement, Your Way
Finishing your basement doesn’t have to be overwhelming. With proper planning and step-by-step execution, you can create a beautiful, functional space that suits your family’s lifestyle and adds lasting value to your home.
Are you ready to start your basement remodeling project? Take it one step at a time, and enjoy the process of transforming an underused space into your home’s favorite room.